Orchids are a popular and beautiful plant to grow, but they require a special type of soil to thrive.
Orchids need a well-draining medium that allows air to reach their roots.
This usually includes a mix of bark, coconut coir or coconut husk chips and then some drainage materials.
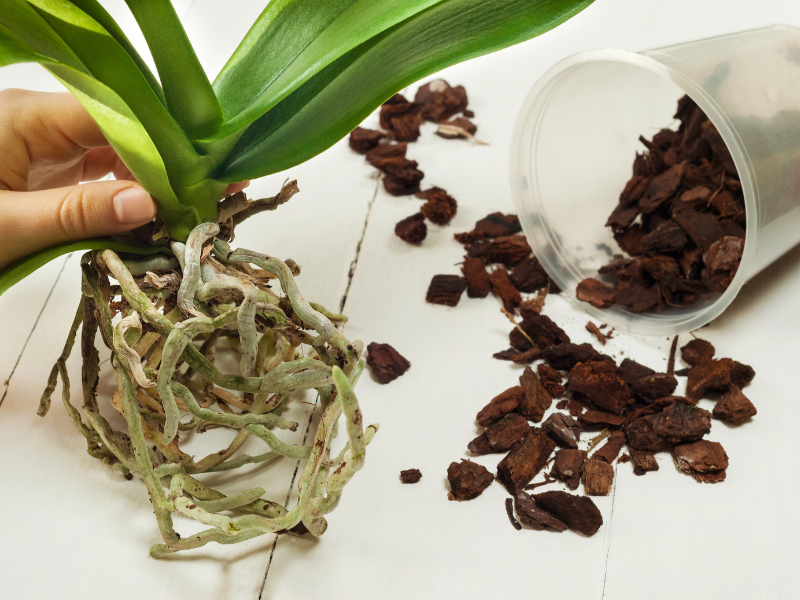
If your orchid has been in the same pot for a few years or you’re desperate to revive your dying orchid, it’s likely time to re-pot it in some new, high quality substrate.
In this article, we will discuss how to make your own orchid soil so that your plants can flourish.
Not only is this method cheaper, making your own orchid mix is better for your plants.
The mass-produced bags by big brands such as Miracle Gro are usually full of cheap ingredients and sometimes come moldy or full of gnats.
This post contains affiliate links, which means I may make a small commission if you click through and make a purchase.
How to Make Homemade Orchid Mix
The best potting mix for orchids is something that is well-draining and allows lots of air flow.
This is achieved by mixing together bark, coconut coir, perlite and sphagnum moss.
Below you will find the exact recipe with a few optional items based on your watering habits and home’s environment.
Step 1: Gather Your Materials and Supplies

Materials You’ll Need:
- Bark or coconut coir
- Perlite or vermiculite
- Sphagnum moss
- Charcoal (optional)
- Fertilizer (optional)
Step 2: Choose A Base Material

The first step in making your own orchid soil is to choose a base material. Bark and coconut coir are the most popular options.
Bark is the traditional choice and is readily available at most garden centers or ships quickly from Amazon.
Coconut coir is an environmentally friendly option that is becoming more popular. It is made from the fibers of coconut husks and is renewable.
Both materials have their pros and cons.
Bark is a bit harder to find, but it is relatively inexpensive and provides good drainage. Coconut coir is more expensive, but it holds moisture better and is easier to work with.
Bark enables the roots of the orchid to stay moistened without being saturated with excess moisture.
Using coarse bark also helps to keep the mix from becoming too compact, which can cause root rot.
You can use a mix of both or one or the other.
Whichever medium you use as your base material, this is the part of the DIY orchid potting mix that provides aeration.
Don’t skip out on this step; his is the most important part of your homemade orchid mix.
You want the base material (coarse bark or coco coir) to be about 50 to 60% of your total mix.
Step 3: Add Perlite or Vermiculite

The next step is to add perlite or vermiculite to your base material.
These materials help to improve drainage and allow air to reach the roots.
Perlite is a type of volcanic glass that is heated to create a lightweight, porous material.
Vermiculite is a mineral that is also heated to create a lightweight, porous material.
Both materials work well for orchid soil, but perlite is a bit more common. Use a ratio of about 10 to 20% of your total mix.
Step 4: Add Sphagnum Moss

Sphagnum moss helps to retain moisture in the potting mix, which is essential for orchids.
It also provides some nutrients to the roots.
Use about 10 to 20% sphagnum moss.
Tip: if you are prone to overwatering your plants, you can leave out sphagnum moss altogether.
If you’re notorious for forgetting to water your plants, definitely add about 20% sphagnum moss.
This will help it retain a little more moisture allowing you to go a little longer between waterings.
Step 5: Add Charcoal (Optional)

Adding charcoal to your orchid soil can help to improve drainage and reduce the risk of fungal infections.
Charcoal is also a natural filter that can help to remove impurities from the soil.
If you decide to add charcoal, use a ratio of up to 10% of your base material, perlite or vermiculite, and charcoal.
Step 6: Add Fertilizer (Optional)
If you have a mature plant and want to give your orchids an extra boost, you can add fertilizer to your soil mix.
Orchids require a specific type of fertilizer that is formulated to meet their unique nutritional needs.
The ideal fertilizer for orchids is a balanced formula with a ratio of equal parts nitrogen, phosphorus, and potassium (such as 20-20-20).
This type of fertilizer promotes healthy growth, flowering, and overall plant vigor.
For a young orchid or one that is not looking very healthy, I recommend waiting to add fertilizer until 2 to 3 weeks after it’s been repotted in your new homemade mix.
Orchids should not be fertilized when they are in a state of stress, so just wait until it’s a little more established in its new environment.
Step 7: Mix and Test

Once you have added all of your ingredients, it’s time to mix everything together. Use a large bowl or bucket and mix the materials thoroughly.
Before you plant your orchids, test the soil to make sure that it is the right consistency.
After pouring some water over it, take a handful of soil and squeeze it tightly.
If the soil falls apart easily, it is too dry. If water drips out of the soil, it is too wet. The ideal consistency is moist but not too wet.
Step 8: Plant Your Orchids
Now that your soil mix is ready, it’s time to plant your orchids. Gently remove your orchids from their old pots and shake off any old soil.
Make sure to remove any dead or damaged roots.
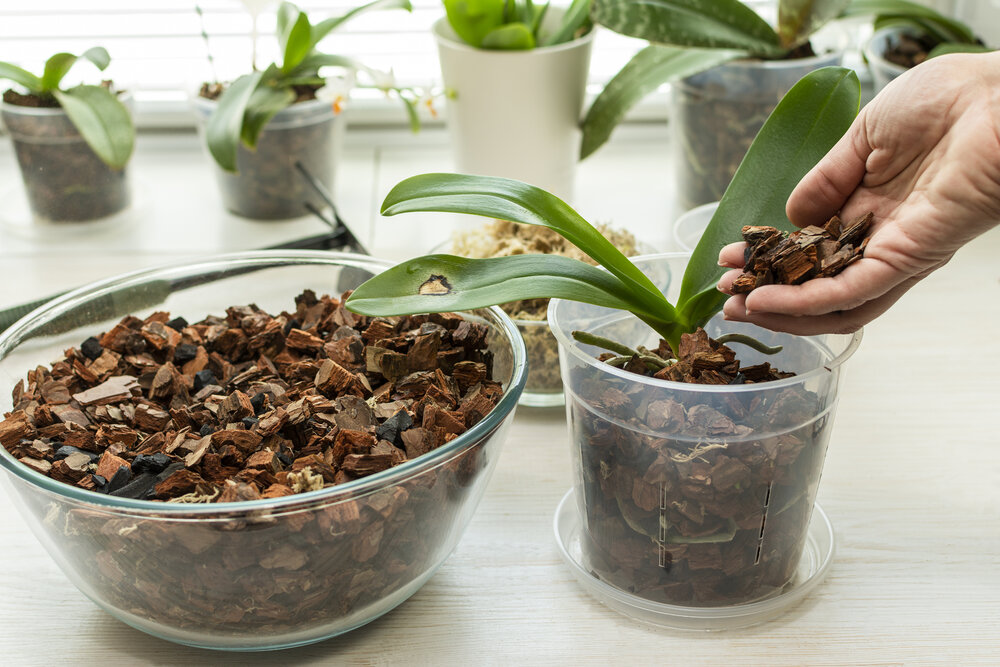
Fill your container about halfway with the orchid soil.
Then, place your orchids in the new pot and fill in the gaps with your soil mix.
Gently press the soil around the roots to hold the plant in place. Water your orchids thoroughly and let the excess water drain away.
How to Water Orchids Potted in Your Homemade Orchid MIx

First 8 Weeks
When you repot a new orchid, you need to water it more frequently for the first 1 to 2 months because the new potting mix is less effective at holding water.
Especially if you use bark chips over coco coir, the bark needs to break down after a few waterings before it becomes better at retaining moisture.
Water your orchid as the media dries out, usually every 2 to 3 days.
A clear pot can help you monitor the state of the roots and determine when it’s time to water.
You’ll know you’ve achieved the correct orchid soil if it’s drying out slightly every 3 to 4 days.
If it’s taking longer than 5 days to dry out, add in more perlite.
If it’s drying out every 1 to 2 days, add in more sphagnum moss which will help it retain more moisture.
After 8 Weeks
After your orchid has been living in its new potting mix, it should be well adjusted to its new home.
As far as watering goes from this point forward I water the orchid when its aerial roots are looking silvery white in color.
If the aerial roots are still bright green, that’s usually an indication that it doesn’t need a watering.
Will This DIY Orchid Soil Work for all Types of Orchids?
Different orchids have different requirements for their growing medium depending on their natural habitat and growing conditions.
Most household orchids are epiphytic, which means they grow on other plants and trees, while others are terrestrial, which means they grow in soil.
Chances are you likely have an epiphytic orchid such as the Phalaenopsis or maybe even a Dendrobium.
They prefer a well-draining mix that allows for good air circulation around the roots.
These orchids are often grown in a mix that contains a combination of bark, sphagnum moss, and perlite or other similar materials as mentioned in this article.
What Can I Use Instead of Orchid Potting Mix?

If you cannot find orchid potting mix or prefer to use an alternative, there are several options you can consider.
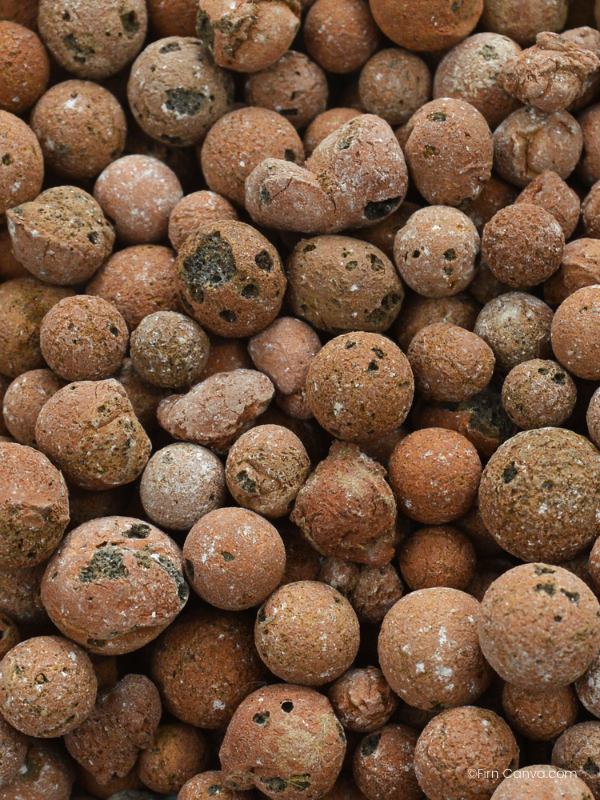
LECA
LECA (lightweight expanded clay aggregate) is a popular alternative to traditional potting mix for orchids because it provides excellent drainage and aeration, which can help prevent root rot and other issues.
Read more about it here in my Easy Guide to Growing Houseplants in LECA: Tips and Tricks for Success
Bark Chips
Bark chips are a popular alternative to orchid potting mix.
Use a mix of small and medium-sized bark chips to evenly fill your container.
Make sure the bark chips are clean, free of debris, and have been soaked in water to remove any excess salt.
Coconut Coir
Coconut coir is another popular alternative to orchid potting mix.
It is made from the fibers of coconut husks and is an environmentally friendly option.
Coconut coir holds moisture well, allows airflow and is easy to work with, and can be used as a substitute for the bark in the orchid potting mix recipe.
Perlite
Perlite is a lightweight and porous material that is commonly used in potting mixes.
It provides good drainage and aeration for plant roots. You can use perlite as a substitute for the bark in the orchid potting mix recipe.
Vermiculite
Vermiculite is a mineral that has been heated to create a lightweight and porous material.
It holds moisture well and can be used as a substitute for the bark in the orchid potting mix recipe.
Sphagnum Moss
Sphagnum moss is a popular alternative to orchid potting mix, especially for epiphytic orchids.
It is soft, fluffy, and holds moisture well. You can use sphagnum moss as a substitute for the bark in the orchid potting mix recipe.
Is it Better to Make My Own Orchid Mix Instead of Buying Store Bought?

The decision to make your own orchid potting mix or buy a store-bought one depends on several factors such as cost, quality, and your personal preferences.
Here are some factors to consider:
Cost
Making your own orchid potting mix can be less expensive than purchasing a pre-made mix in the long-run.
While you’ll have to buy several bags of different materials, you will yield much more potting mix than buying pre-made.
If you’re planning to revive several orchids, I recommend investing in making your own orchid media.
Quality
When you make your own orchid potting mix, you have more control over the quality of the ingredients.
You can select high-quality materials and adjust the mix to suit your specific orchid species’ needs.
I find that the pre-packaged Miracle Gro Orchid Mix contains a large amount of unnecessary soil, and this makes the bark retain moisture as it’s harder for the water to drain.
Personal Preferences
Making your own orchid potting mix can be a fun and rewarding experience, especially if you enjoy gardening and want to experiment with different ingredients.
Visit my Houseplant Toolbox for a list of all my favorite supplies & goodies!
More Orchid Posts:
How to Propagate Orchids from Aerial Roots in 6 Easy Steps
How to Save a Dying Orchid in 5 Steps
Orchid Care After Flowers Fall Off (+ How to Trick Your Orchid into Reblooming)

