Despite its delicate and dainty stature, the pilea glauca is actually one of the easiest houseplants to propagate. Also sometimes known as the aptly named Silver Sparkle (or other botanical name pilea libanensis), this shimmering indoor plant is unfussy.
This winning combination of being simple to care for and easy to propagate makes it the perfect plant to expand your plant collection or give away as gifts.
This post contains affiliate links, which means I may make a small commission if you click through and make a purchase.
Is it Better to Propagate Pilea in Water or Soil?
The best (and easiest) way to propagate Pilea glauca is in soil.
Growing roots from stem cuttings in water takes longer and has a much lower success rate. Growing Pilea roots in soil is much less finicky.
Propagating Pilea Glauca in Soil: Step by Step Process

Propagating a pilea glauca in soil is as simple as taking a healthy cutting, placing it in soil, keeping it at the right moisture level and then wait for new sprouts.
How Do You Take Pilea glauca Cuttings?
Find a healthy looking stem and make a clean cut just below a node.
A node is a small bump along the stem. You want to make sure that there are at least 2 or 3 healthy leaves just above the node.
You might find that one stem has a few nodes, so you can take a few cuttings, as long as each cutting has leaves on it.
Also, make sure there are no leaves below the node. You want about a half inch to an inch of bare stem because this part will be placed in the soil.
Tip – you do not want to plant stems with leaves below the soil.
The leaves will rot, making your cutting unhealthy and useless. Rotting plants beneath the soil are also one of the biggest causes of fungus gnats.
How Many Cuttings You Should Take
When propagating any plant, I always recommend taking at least 3 to 6 cuttings (or more) for the best success rate.
Even the most experienced gardener won’t see a 100 percent success rate when propagating a plant, so alway start with a few cuttings to ensure at least one takes off.
Place the Pilea Glauca Cuttings in Soil: 2 Methods
You can either choose to plant your pilea glauca cuttings directly in the soil, or lay them on top of the soil.
If it’s your first time propagating a pilea glauca plant, I recommend attempting both methods.
For both techniques, you’ll need a well-draining potting soil mix.
Since this is an unfussy plant to care for, you can use a regular high quality potting mix with some peat and perlite mixed in.
These are easy to find on Amazon – this is the potting soil mix I use.
Use Propagation Pots with Humidity Domes
If you’re going to try both soil methods, use two different pots. Fill each pot with soil right to the brim (when you water it will compact slightly).
In one pot, lay your cuttings on top of the soil. Make sure the node (little brown bump) is facing down towards the soil, as this is where the roots will grow from.
Tip – try the callous method on a few cuttings.
I suggest letting a few of the cuttings callous over before laying them on top of the soil.
This means allow the cuttings to dry out for a few days. Where you made the cut should be dried and calloused over, almost like a small ‘scab.’
In the other pot, use a chopstick to make a small impression in the soil, and plant your cutting in that hole.
Make sure the node is below the surface, as this is where the roots will grow from.
The most important part of the Pilea glauca propagation process is that they remain somewhat humid. For this reason, you’ll need to cover them with a dome or a plastic bag.
The easiest way is to use these propagation pots that come with a fitted dome.
Keep the Cuttings Slightly Moist
For the first few weeks, you should mist the top of the soil every couple of days.
Since this is when the cuttings are the most delicate, watering from a spout could be a little too heavy.
You also want to open up the dome (or the plastic bag) for an hour or two each day to allow the plant to breathe and prevent rot.
After a few weeks, only water when the top inch of the soil is dry.
You can easily tell by inserting a chop stick into the soil.
If the chopstick comes out clean, or has a few dried pieces of soil, it’s time to water. If soil is still sticking to the chopstick, leave it alone.
After a few months, roots will have grown from your cuttings and you are on your way to having a brand new Pilea glauca.
Can You Propagate Pilea glauca in Water?

Propagating Pilea glauca in water is quite effortless, and I recommend this type of propagation if you’re a beginner houseplant hobbyist.
The reason for this is because propagating it in water allows you to see the roots grow. As well as monitor for any signs of rot.
When you propagate in soil, it’s more of a guessing game as to when roots have developed – which is why I recommend water propagation for your first time propagating Pilea glauca.
How to Propagate (grow roots) Pilea Glauca in Water
Take Stem Cuttings Carefully
First take a few stem cuttings.
On each stem, find a node (small brown bump) and make a clean cut with a sharp pair of plant scissors about one inch below the node.
Make sure there are at least 2 or 3 leaves above the node.
Place Cuttings in the Proper Type of Vase

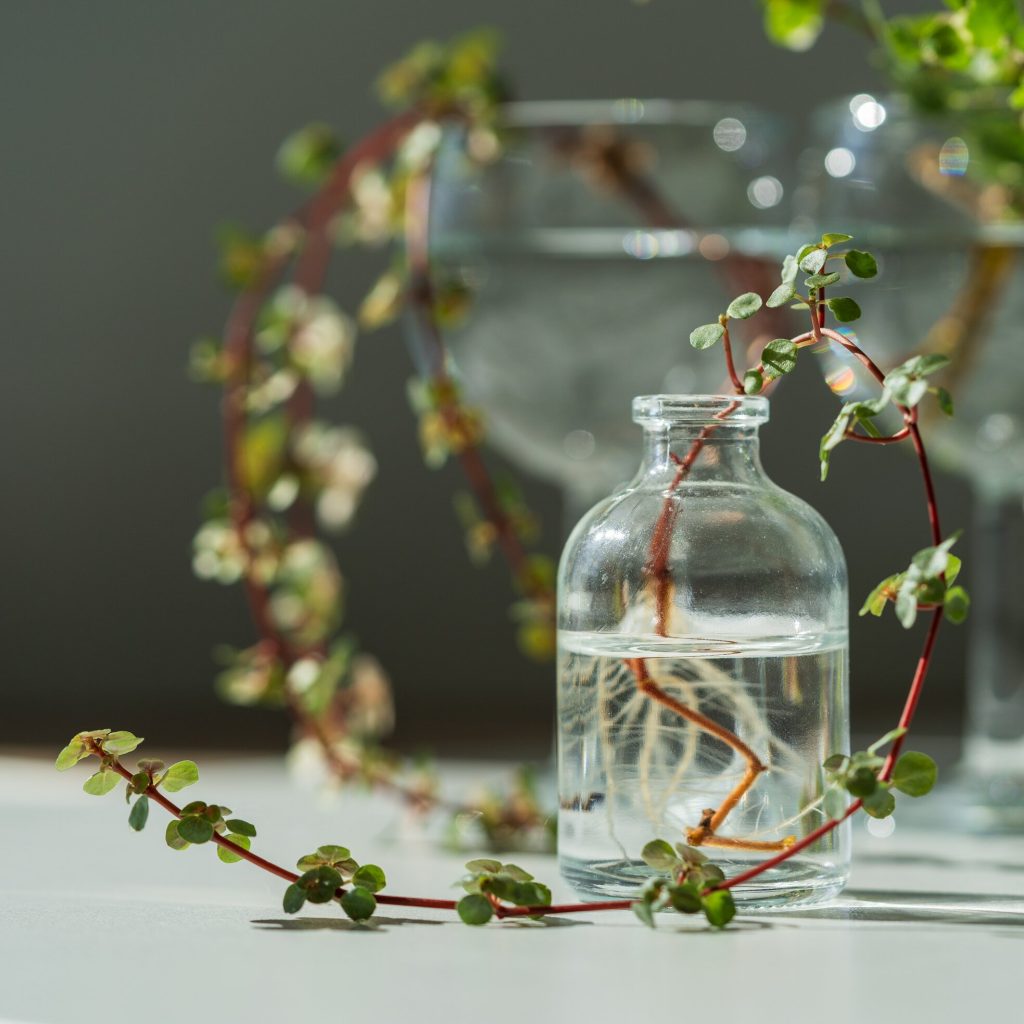
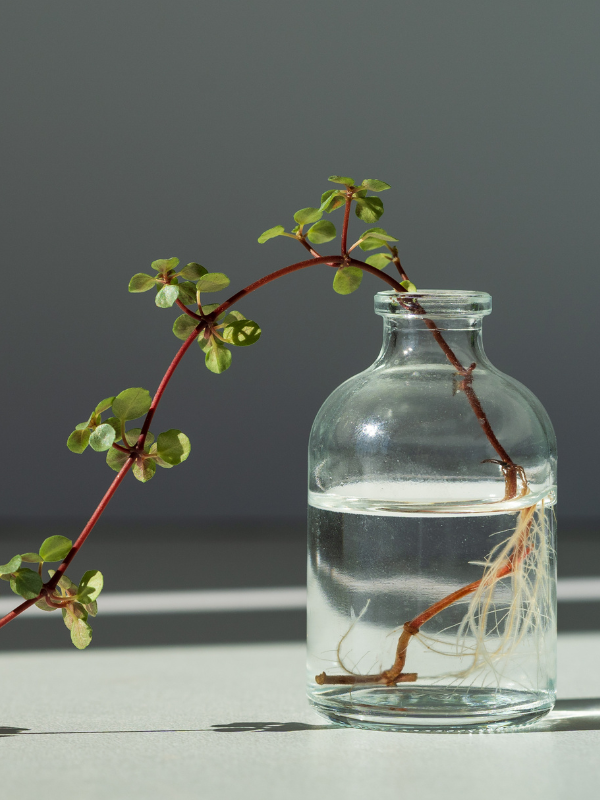
Place these cuttings in a glass vessel so that they are upright.
Try to find one tall enough so that the stems don’t touch the bottom.
It’s also important that the opening is more narrow than the bottom. This keeps the stems upright, while allowing roots to grow and breath at the bottom.
These glass vases are the best shape I’ve found for propagating Pilea glauca and other similar plants with long stems.
Monitor Cuttings for 3 Weeks
Place your cuttings in bright, filtered light. Avoid direct hot sun so that the leaves don’t get scorched. Also avoid placing them on a window sill in case of drafts.
Change out the water once per week. This is to introduce fresh oxygen to the roots.
After about 3 to 4 weeks, you should notice roots that are about one inch in length and ready to be planted in soil.
You can also leave the cuttings in water for up to a few months.
However, once the roots are quite established, it will be harder to introduce them to soil.
I recommend planting your water-grown cuttings in soil when the roots are no longer than 2 inches.
When you eventually plant your water cuttings in soil, you’ll have to keep the soil quite moist for the first couple of weeks, and eventually taper off how moist it is.
This is because the roots have been living in water for some time, and will be shocked if introduced to dry soil.
Caring for Your Pilea Glauca After Propagation
Congratulations! The hard part is over. Once you’ve successfully propagated your pilea plant, taking care of it as it grows into a mature plant will seem much less daunting.
Keep it in bright indirect light, and experiment with how moist it likes to be.
Depending on the light and the air in your home, it might prefer to be a little more or a little less moist.
For a couple weeks, lightly mist your plant every once in a while. It it appears to be thriving, keep this up. If the leaves start to turn yellow or droopy, stop misting and let the soil dry out.
You can also try letting the top one or two inches of soil dry out in between waterings.
If the stems looks strong and healthy, keep up with this watering schedule. If the leaves and stems are looking brittle and dried out, you’ll need to increase how much moisture it’s getting.
Visit my Houseplant Toolbox for a list of all my favorite supplies & goodies!

