Propagating plants is one of the easiest and most budget friendly ways to grow your indoor garden collection. While lavender is most commonly propagated via soil, you CAN propagate it in water.
Lavender prefers to be on the drier side when it comes to soil conditions, but by following these tips, you can easily avoid root rot and successfully propagate lavender in water.
This post contains affiliate links, which means I may make a small commission if you click through and make a purchase.
What is the best way to propagate lavender?

The most traditional and popular way to propagate lavender is in soil.
However, beginner houseplant owners might have an easier time propagating in water.
This is because you can monitor the root development, as well as signs of root rot.
How to Propagate Lavender in Water: Step-by-step Process

First, you only want to take cuttings from a healthy and relatively mature lavender plant (at least a year old).
Make sure there are enough stems on the mother plant so that when you take cuttings (sprigs) from it, it will still have several stems and foliage left.
If you can, choose stems that don’t have buds and haven’t bloomed yet.
Growing a flower takes a huge amount of energy for the plant, and we want all the energy to be directed to root growth.
If you only have stems with buds (that haven’t bloomed yet), you could pinch off the buds to stop the plant from directing its energy toward the flower.
Where to cut the lavender stem to propagate it

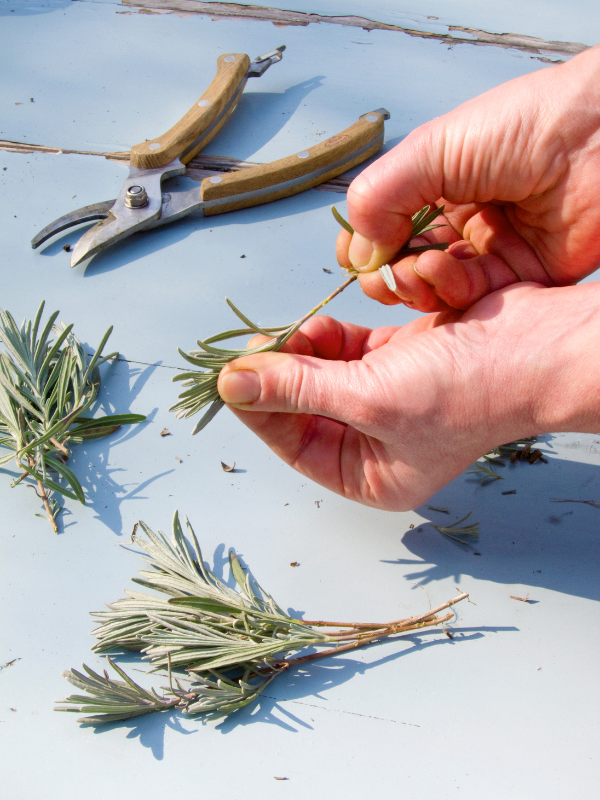
Look for sprigs (stems) that are tall and straight, and make a cut one inch below a node, which is a small bump along the stem.
Make sure your stems do not have any buds developing. It’s also important that the color of the leaves are healthy looking, and not turning yellow.
Ensure there are no leaves below the node. If there are, snip them off as close to the stem as possible.
Gently take your sharp plant scissors and strip the end of the stem.
You want to gently scuff it up, which will help stimulate new growth.
Tip – in general, hardwood cuttings have a higher propagation success rate compared to softwood.
That being said, it’s still possible for softwood lavender cuttings to develop roots in water.
Place the Cut Lavender Sprigs in Water
Place your lavender cuttings in glass jars with a few inches of water.
Make sure the nodes are submerged underwater, as this is where the roots will grow from.
Replace the water every week to 10 days, even if the water is still clear and doesn’t look murky.
This is to replenish oxygen to the roots, which they need to thrive!
How long do lavender cuttings take to root in water?
As long as you take a cutting from a healthy lavender plant, you should see some roots at least a quarter inch in length after about 3 to 6 weeks.
Softwood stems (younger and more flexible stems) will usually root faster, but they can be less hardy when transplanted.
Hardwood (woody) stems (stiffer and more mature stems) take longer to root – expect about 5 to 6 weeks for the start.
But they generally have a better survival rate.
Planting Rooted Lavender Cuttings in Soil

When the roots have reached 2 inches in length, the plant is ready to be transferred to soil.
Heavily wet your potting soil and fill your pot a little over half way.
You want the soil to be a little drier than mud consistency.
I use a general purpose potting soil with some added vermiculite and/or perlite – depending what you have.
Place the cutting on top of the soil, and then gently fill in with the rest of the very wet soil.
After this, don’t water it for about 5 to 7 days. You’ll want the soil to start out wet and eventually dry out to normal conditions.
When moving a cutting from water to soil, it will have a better survival rate if it’s introduced to different conditions very slowly.
It’s not a good idea to plant a cutting that is rooted in water directly into dry soil.
